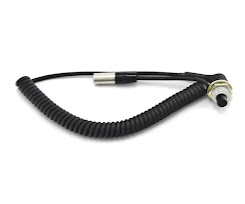
Here are some steps you can follow to install a hole mount PTT switch for the Sampson racing radios system:
Gather Materials:
- Hole mount PTT switch
- Mounting hardware (if not included)
- 3/8" drill bit and drill, along with appropriate tools
- SRC Racing radio harness
Select a Location:
- Choose a suitable location on the panel or wheel where you want to mount the PTT switch. This should be easily accessible to the user.
Drill a Hole:
- Using an appropriately sized drill bit, create 2 holes in the chosen location.
Insert the PTT Switch:
- Insert the threaded portion of the PTT switch through the hole from the front side of the panel.
Secure the PTT Switch:
- On the backside of the panel, secure the PTT switch in place using the provided mounting hardware. This typically involves tightening a nut or using a lock washer to hold the switch firmly in position.
Connect the Wiring:
- Connect the wiring of the PTT switch to your racing radio system. This may involve attaching wires to terminals on the back of the switch.
Test the PTT Switch:
- Before finalizing the installation, test the PTT switch to ensure it's functioning properly. Press the button and check if it successfully transmits a signal to the radio system.
Finalize the Installation:
- Once you're satisfied with the placement and functionality of the PTT switch, make any necessary adjustments and ensure all connections are secure and coil cord is attached to the wheel along with under the dash.
Tighten and Seal (Optional):
- If provided, use a wrench or tool to tighten the nut on the backside of the switch to ensure it's securely fastened.
Safety and Functionality Check:
- Perform a final check to ensure that the PTT switch is securely mounted and functions properly. Test it one more time to be certain.
Remember to consult the manufacturer's instructions and guidelines specific to your racing radio system and PTT switch, as there may be variations in installation procedures. Always prioritize safety and functionality when installing any electronic components in a racing environment.


